Crackle paint is a fun decorative finish that does not require any expensive specialty paint, although there are many companies that will charge you a lot of money for their specialty crackle paint.
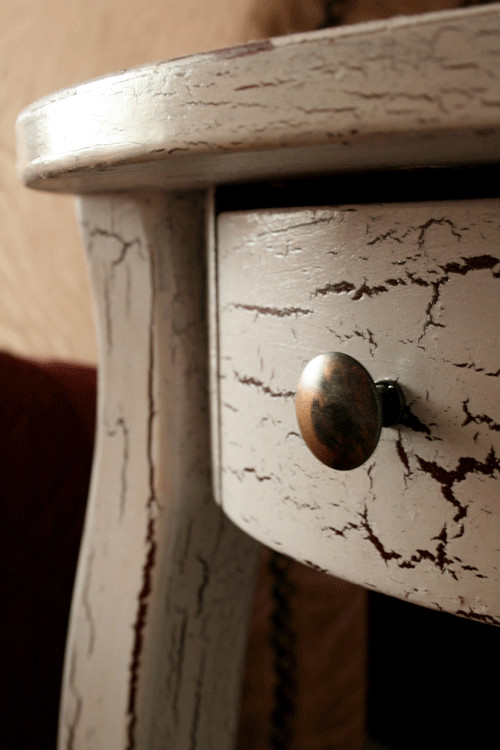
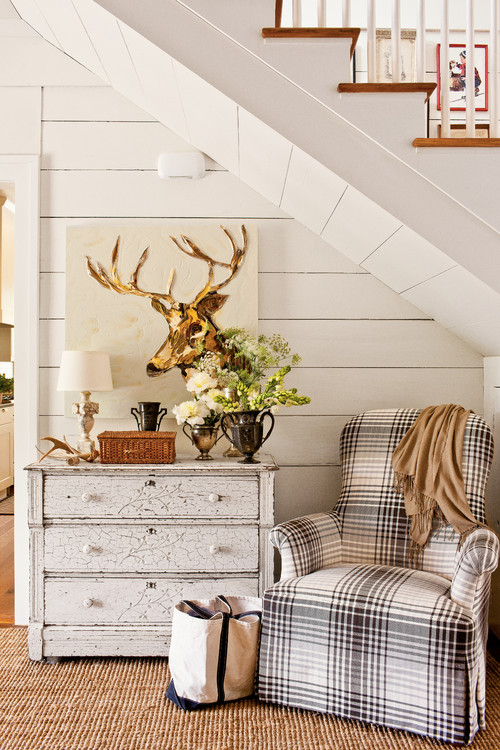
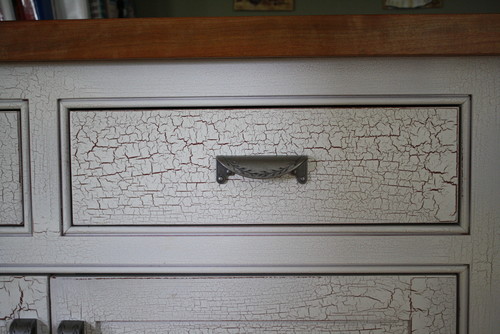
Adding a crackle finish to an object will give it an aged look that is very popular in vintage interiors, especially the vintage, farmhouse, or shabby chic styles.
You can crackle finish furniture, an old wooden box, kitchen or bathroom cabinets, a picture frame, ceiling fan blades, a door, Christmas ornaments, Easter eggs, flower pots, your ceiling, decorative wall letters, a wooden sign, a lamp, musical instruments, a vase, curtain rods, decorative sculptures, an old bucket, or whatever else you want.
All you need to crackle paint is 2 contrasting colors of regular latex or acrylic paint and some school glue or wood glue (Elmers is a popular brand of school glue).
Here are the steps for how to make crackle paint cheaper than expensive specialty crackle paint, using items you probably already have.
 photo courtesy of Expressions by Christine flickr.com/photos/expressionsbychristine/3750354840/Base Coat
Start by painting your base coat.
The color of your base coat will be the color shown in the cracks of your finished piece.
In the photo to the right, the base coat is black.
If the item you want to paint has a glossy finish, you will need to sand it well before applying the first layer of paint.
Follow the paint manufacturer's instructions on how to use their paint and the appropriate drying time. Drying time may be 4 to 8 hours.
Make sure the paint is completely dry before proceeding to the next step.
Glue
Generously paint school glue or wood glue on top of the base coat of paint.
The thicker the layer of school glue, the larger the crackles.
Let the glue dry just a few minutes until it gets tacky but not totally dry.
Top Coat
The top coat is the color you want on top.
In the first photo of the green crackle above, it is the bright teal green color.
Paint your top coat going in only one direction, not back and forth.
Do not paint an area for more than 5 seconds else the crackle effect will not work.
Only do one coat and do not touch up spots that were not coated well the first time.
For a more aged effect, thin your paint a bit by adding a little water and mixing well.
Paint your entire piece and prepare to be amazed. The crackles should start to appear within a few minutes as the paint dries.
Tips
Experiment crackle painting on a scrap piece of wood before painting your finished piece to make sure you get the results you desire. Use more and less glue to determine the size of crackle that you want.
If you are painting a large object, follow all 3 steps on one section at a time so the glue does not fully dry before adding the top coat.